
Simplify The Meshforce M1 Setup With Us
Generally, a sluggish network and dead spots at your residence interrupt your surfing experience. Likewise, to abolish these issues, the Meshforce M1 networking device is here for you. Additionally, to use this networking device to its full extent, the Meshforce M1 setup is mandatory. This will authorize you to customize the router according to your preferences.
Furthermore, you can either go ahead with the web address or the My Mesh application. Additionally, to learn more about the Meshforce M1 mesh wifi system configuration, you just read this brief guide that we share with you. The detailed steps are mentioned here to carry out the setup process.
What are the methods to perform the Meshforce M1 setup?
Additionally, the procedure for configuring your mesh system is quite easy, but to start with it, you need to have a few things ready. The primary ones are an active connection, a computer/smartphone, a web address, the My Mesh app, etc. When you get ready with all these, follow the instructions mentioned below:
Web GUI (192.168.0.1)
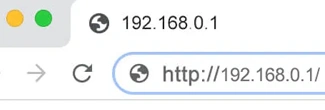
- Primarily, link your computer to the Meshforce M1’s network.
- Now, run the web browser on your computer and enter the 192.168.0.1 IP address in the browser bar.
- After that, a login window appears to you.
- Hereon, key in the accurate admin details to access the router interface.
- After logging in, you visit the home dashboard of the mesh router.
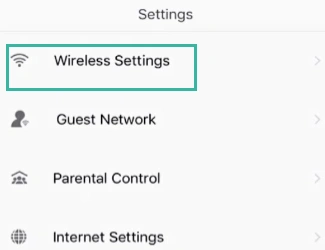
- Further, visit the Settings>WiFi/Wireless Settings and modify the network name (SSID) & Password of your wireless network.
- Similarly, explore the Advanced settings, like Parental Controls, Guest Network, Network Settings, etc., and configure them by following the on-screen instructions.
- At last, tap on Save to secure the modified settings.
- Here, you are all set with the Meshforce M1 mesh wifi system configuration.
My Mesh App
- To begin with, join the Meshforce network using your smartphone.

- After that, make sure that you use an upgraded version of the My Mesh application.
- Now, start the app and access the admin account by entering the accurate user details.
- Hereon, you see a Welcome page after logging in, tap on the Setup button.
- Now, you land on the Meshforce M1 setup dashboard.
- Further, go to the Wireless Settings and change the network name (SSID) and password here.
- After that, revisit the home screen and explore Advanced Settings.
- Hereon, proceed with the on-screen instructions to configure the additional settings, like Bridge Mode, AP Mode, Guest Network, Firmware update, etc.
- Finally, tap on the Save/Apply, and the setup procedure ends successfully.
Troubleshooting tips to fix the Meshforce M1 setup issues
Moreover, the configuration of the Meshforce M1 is quite simple, but sometimes users find it complex. Therefore, they encounter several issues, like login or setup failure, unable to connect to the local network, and more. In addition, if you want to get rid of these issues, follow the below-mentioned troubleshooting tips:
- Make sure Meshforce M1 is placed in a ventilated area.
- Cross-check the admin details and web/IP address before entering them.
- Look at the cable connections as the router and modem are linked properly.
- If you find any damaged cable or adapter, replace it immediately.
- Eliminate the signal interferences, like mirrors, furniture, cordless phones, etc., or relocate your networking system.
- Fix the browser issues by removing the unnecessary data, such as cache, cookies, etc.
- Check the router for a firmware update. If available, then follow the on-screen instructions to upgrade it.
- Power cycle the networking system to eradicate technical issues and bugs.
- Ensure that you enable all the necessary permissions on the My Mesh application.
- When nothing else works, then factory reset the Meshforce M1 router and reconfigure it from scratch.
Bottom Line
In closing, this brief guide summarizes the essential information regarding the Meshforce M1 setup. Here, you will explore the web address and the application methods with detailed steps to customize your networking device according to your preferences. Additionally, easy solutions are also demonstrated to fix the setup issues. Still have more queries? Reach out to us!